Introduction
Customizing the user interface in Liferay can be done in many ways, but doing so without touching the core code is essential for easier upgrades and maintenance. In this post, we'll look at two popular techniques for changing the design of Liferay: CSS Client Extension and Theme CSS Client Extension, and discuss how you can use them to adjust Liferay's appearance.
Prerequisites
Liferay 7.4+
Difference Between CSS and Theme CSS Client Extensions
| Feature | CSS Client Extension | Theme CSS Client Extension |
|---|---|---|
| Scope | Applies globally across the entire Liferay instance, regardless of the theme. | Applies only to a specific theme in Liferay. |
| Use Case | Ideal for making global UI changes, fixing styling issues, or adding CSS across multiple pages and themes. | Best for theme-specific customizations, such as modifying colors, fonts, or layouts for a particular theme. |
| Deployment | Deployed as a general client extension, loaded at runtime for all themes. | Deployed as part of a specific theme's customization, ensuring styles apply only when that theme is active. |
| Flexibility | More flexible as it works across all themes. | Limited to a single theme, requiring different extensions for multiple themes. |
| Upgrade-Safety | Does not modify core Liferay files, making upgrades safer. | Also upgrade-safe but dependent on the theme it is linked to. |
| Potential Conflicts | May cause unintended styling conflicts if multiple CSS extensions are applied. | Less chance of conflicts since styles are tied to a specific theme. |
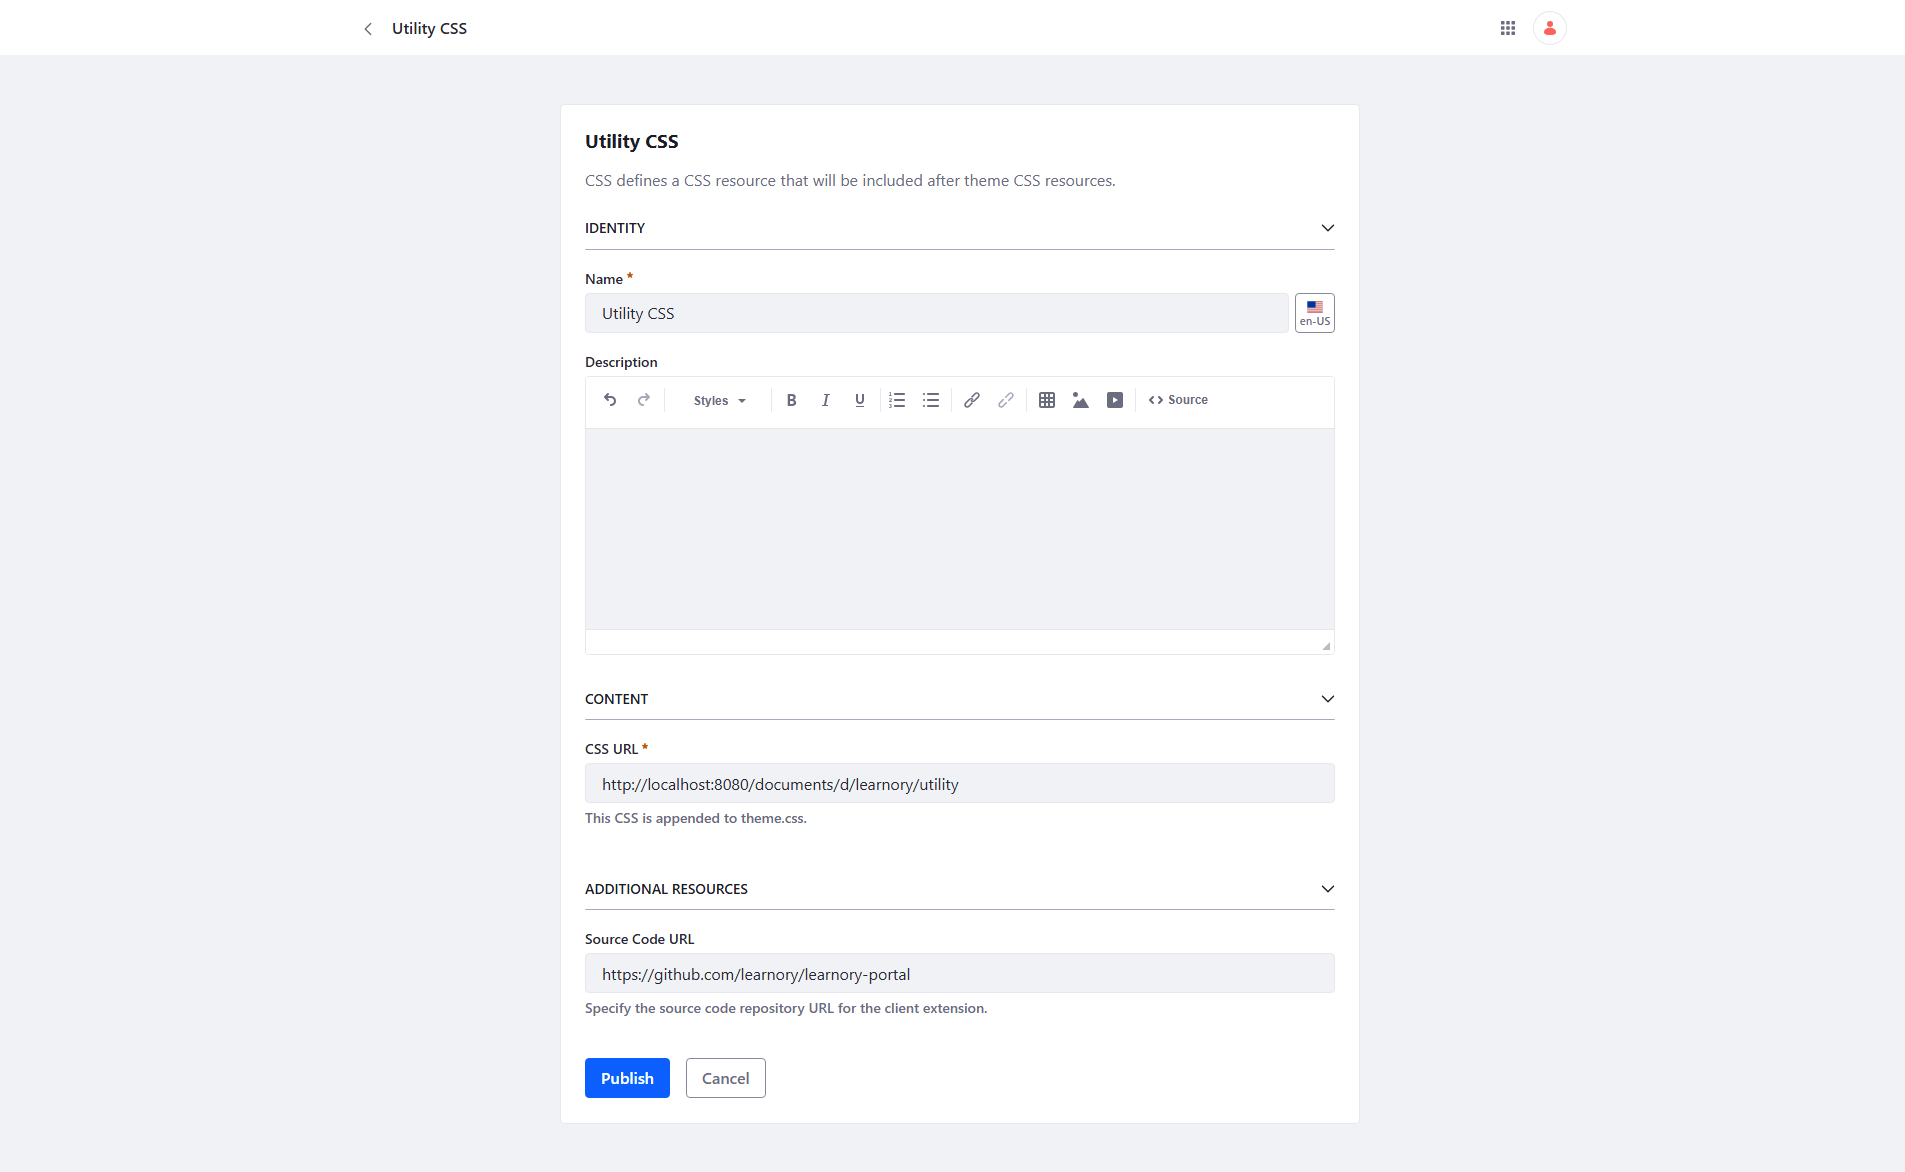
Creating CSS Client Extension
You can create the client extension in two ways:
- Using Liferay's client extension admin panel
- Using Blade CLI
Using Liferay's client extension admin panel:
- Open the Global Menu (
 ), on the Applications tab, and click on Client Extensions.
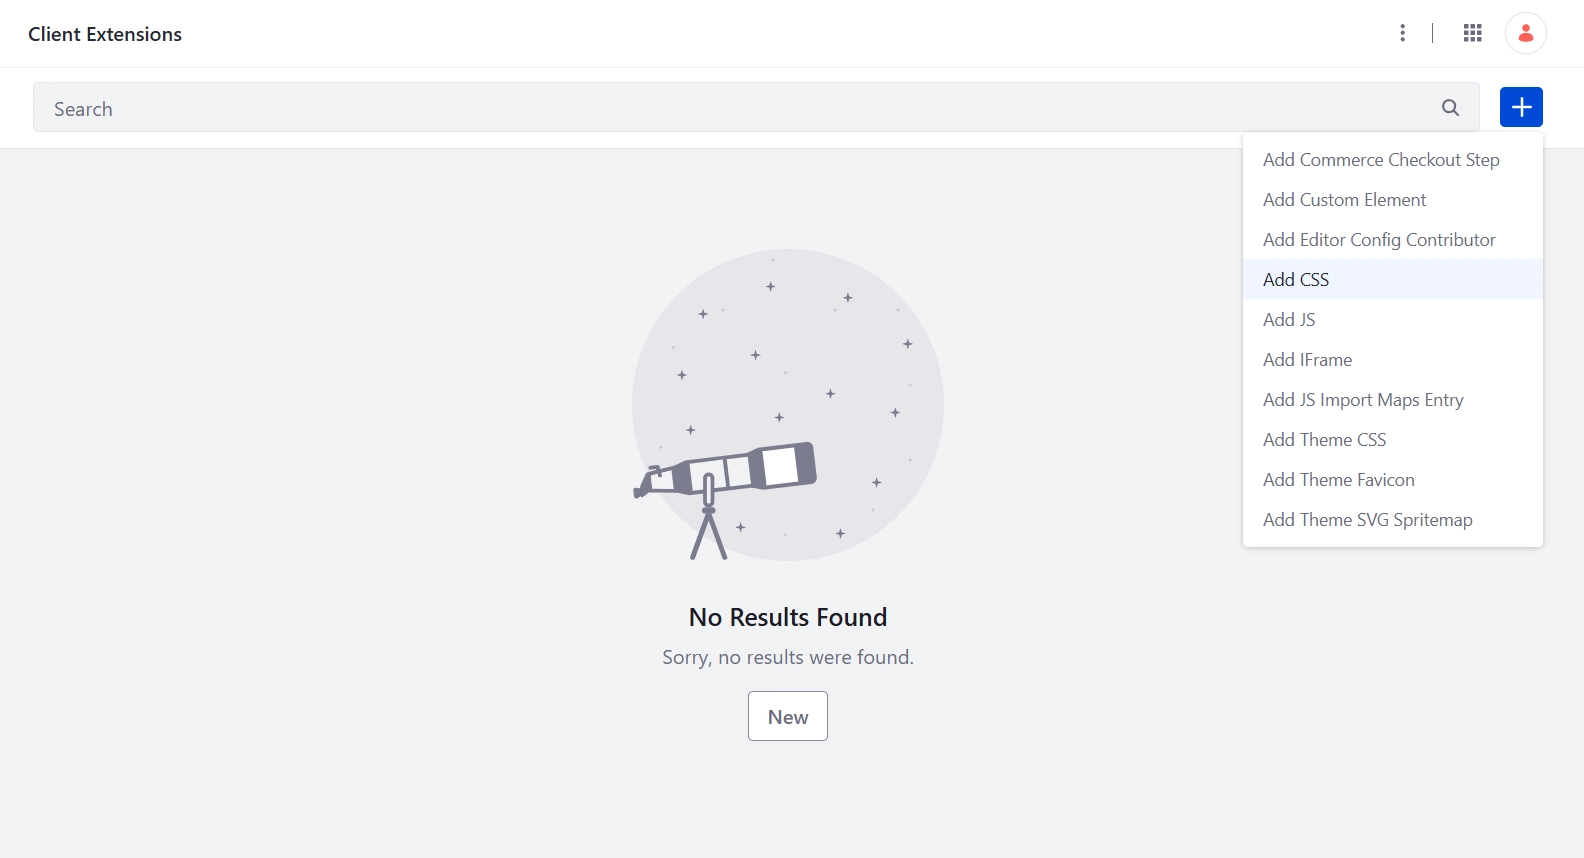
 - To create new client extension, click on the Plus (
 ) and select Add CSS from the dropdown.
Using the Client Extension on a Page
You can configure globalCSS client extension on all pages or specific page.
- Go to Site Menu (
 ) → Content & Data → Pages and click on the Configuration (
  ) under option menu (
  ).
). - Scroll down to the CSS Client Extensions section at the bottom of the page and click the Add CSS Client Extensions button.

Note:
The scope property for a CSS Client Extension can only be configured in a workspace-based client extension project. When creating a client extension through the Liferay UI, the scope cannot be set—such extensions are always page-scoped and can only be used on site pages. The default is layout, and applies only to site pages as set by the administrator.
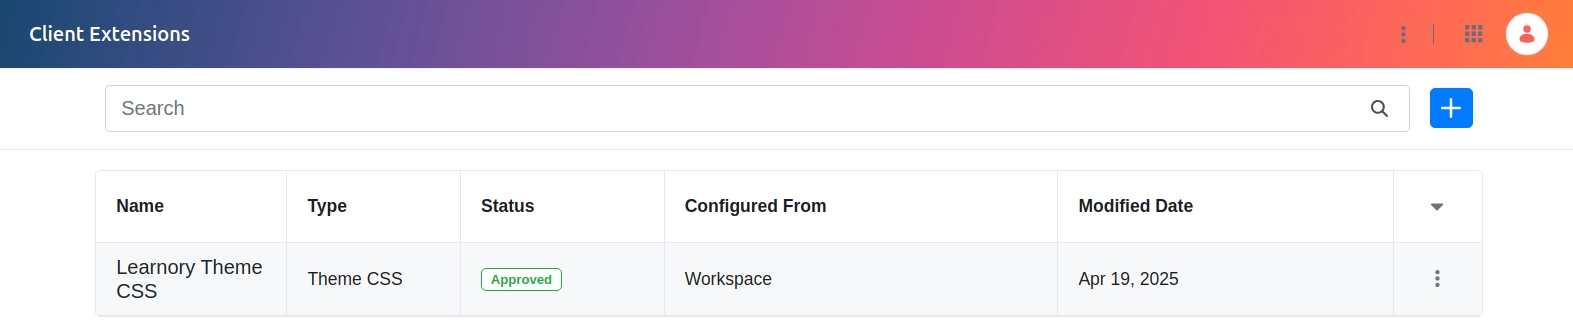
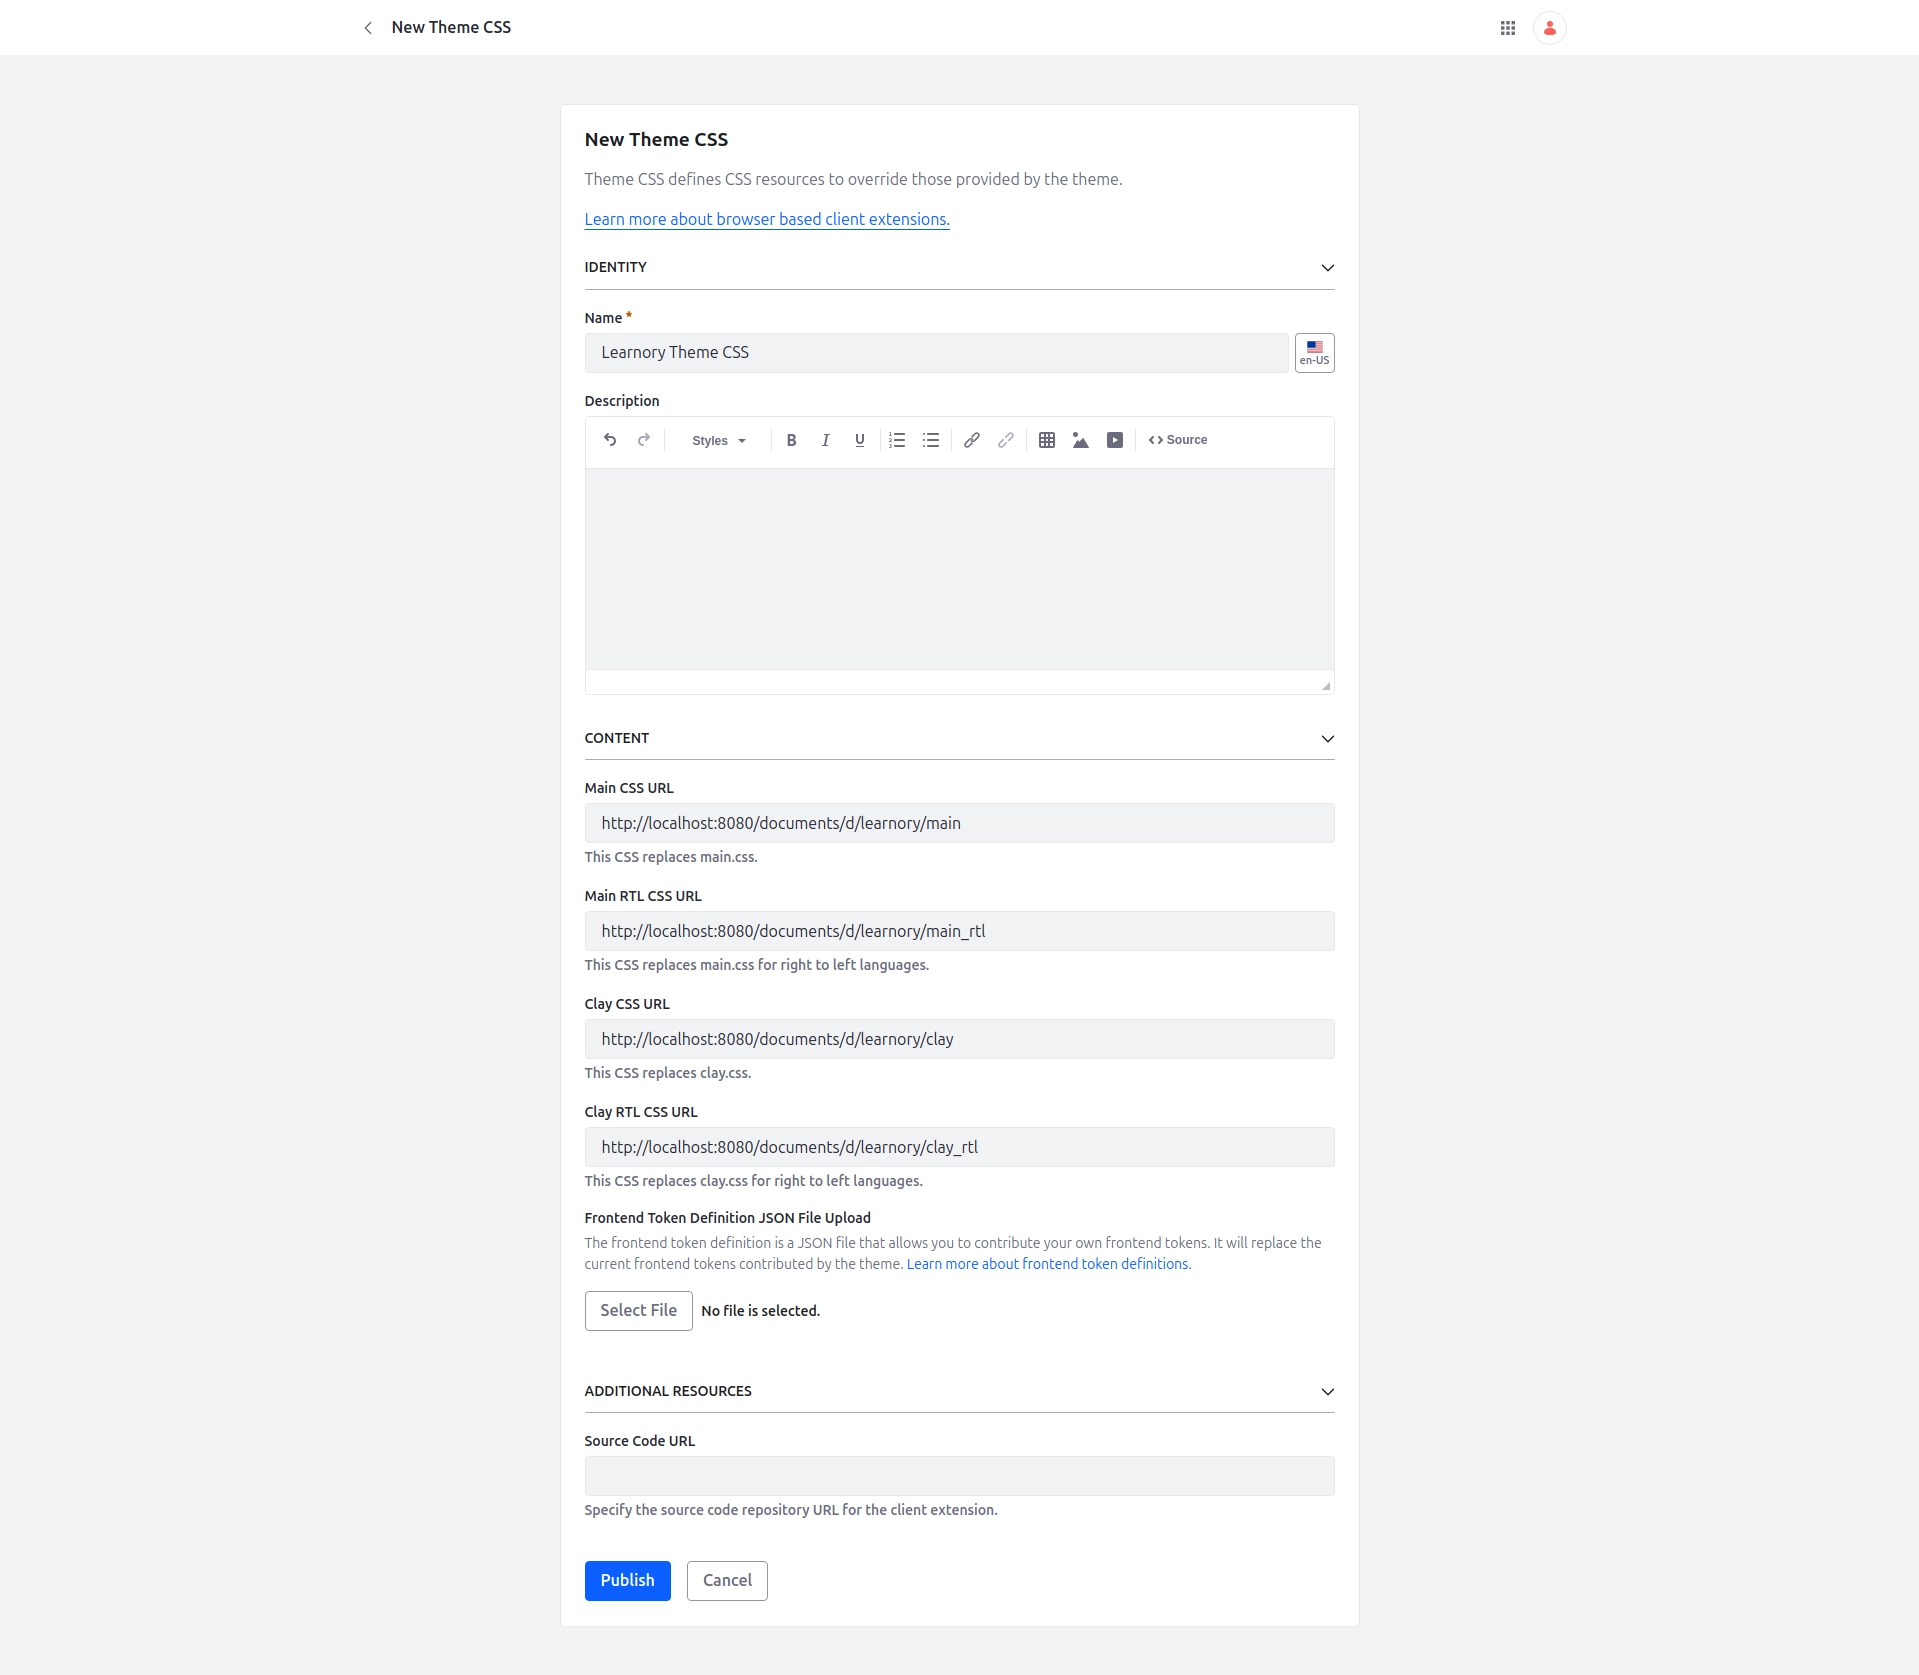
Creating Theme CSS Client Extension
Imagine being able to transform the visual identity of your web page with just a few lines of code. That's exactly what a theme CSS client extension offers. By leveraging this powerful tool, you can effortlessly override the default CSS files (main.css and clay.css) of your current theme, unlocking a world of possibilities to redefine the look and feel of your page.
You can create the client extension in two ways:
- Using Liferay's client extension admin panel
- Using Blade CLI
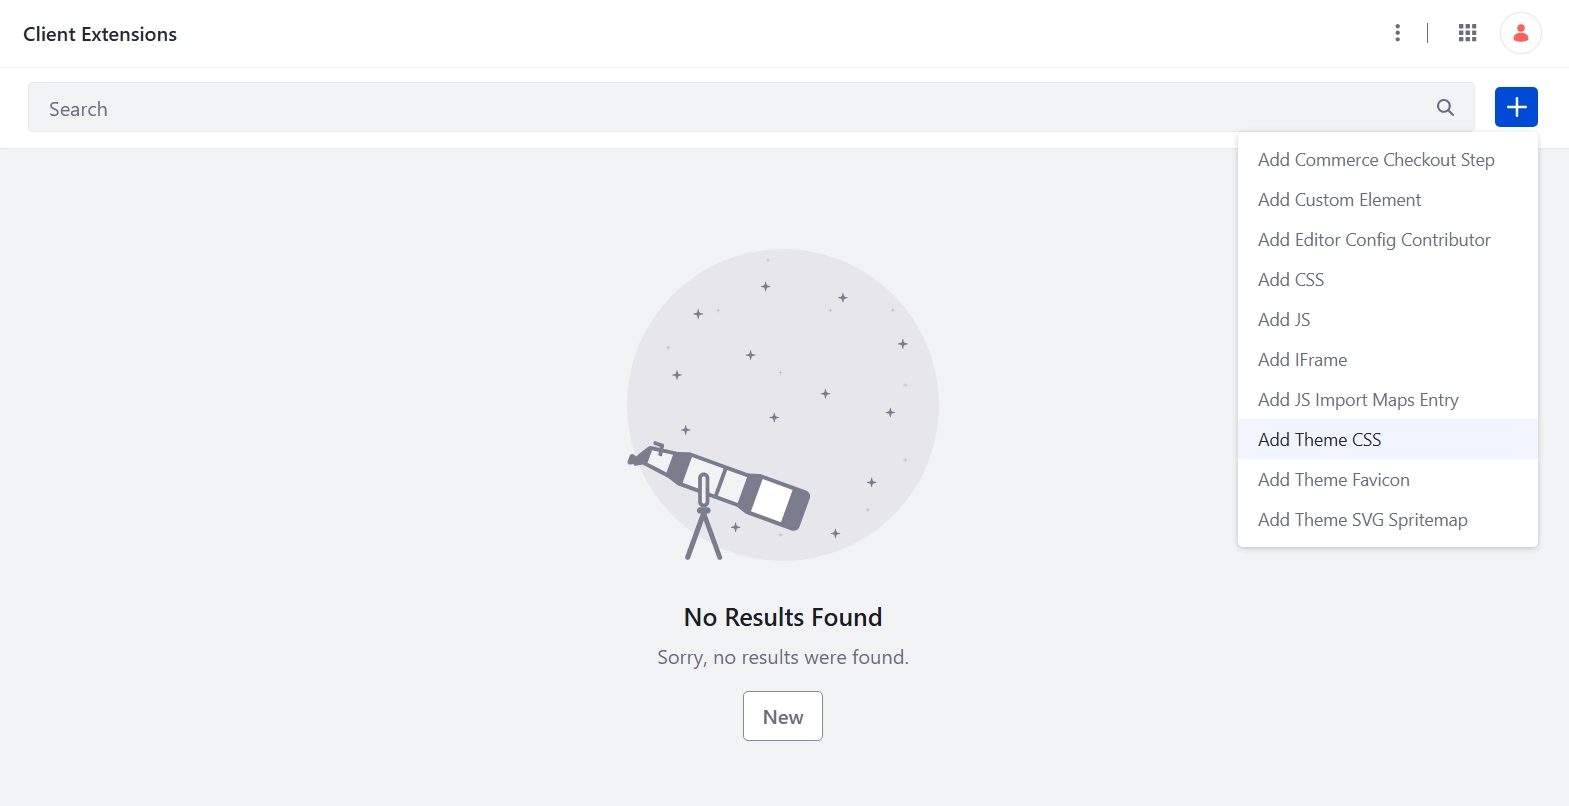
Using Liferay's client extension admin panel:
- Open the Global Menu ( ), on the Applications tab, and click on Client Extensions.
- To create new client extension, click on the Plus ( ) and select Add Theme CSS from the dropdown.
Using the Client Extension on a Page
You can configure themeCSS client extension on all pages or specific page.
- Go to Site Menu ( ) → Content & Data → Pages and click on the Configuration ( ) under option menu ( ).
- Scroll down to the Theme Client Extensions section at the bottom of the page and click the Plus button.